Tuesday, January 15, 2013

Cauliflower Fritters

I made these a few nights ago, but am just now finding the time / words to write about them. They were very easy, and I have a bunch of cauliflower that needs to be used. I say this in the present tense because I still have two more that I need to do something with- maybe tomorrow, we will see. Anyway, this recipe made quite a lot, so I froze most of them and put them in a bag, kind of like little cauliflower veggie burger thingies. I think they would be particularly good toasted up in the toaster oven with some cheese and put in a sandwich or a wrap. I found this recipe on allrecipes.com. Between there and pinterest is where I find most of my recipes or inspiration. And again, I will post a link to the recipe at the end.


The recipe calls for 6 cups of cauliflower, which turned out to be one whole medium sized cauliflower. To tell you the truth I was hoping it would be more but what can you do. I like to follow a recipe as close as possible the first time I make it and then alter it from there. For example, next time I make this I would add more heat. Maybe some red pepper flakes or something along those lines.


So you take the six cups of cauliflower and run it through  the food processor, depending on the size of your food processor I would do it in batches. As I am at my cousin's house and she has a fairly large one, it did about three cups at a time, however, at my house I have a small one that could probably do a half a cup to a cup at a time. you want it to look kinda like cornmeal, so we will call this cauli-meal. Next, you sift 1/2 cup of flour and a tsp of baking powder. Now the recipe calls for a packet of Italian Dressing Mix. I however had already run to the store for baking powder and did not care to go back for this when I just made my own concoction.


I used mostly the garlic and herb seasoning- maybe 1/4 cup ish, and about 2 tsp of basil, thyme, and pepper. Then about a tsp of the celery flakes, and a dash of salt.

And there ya go- Italiany mix. Close enough anyway. Well add this to the cauli-meal mix along with three eggs and mix it up good. I wouldn't bother with a spoon, just wash your hands real good and go at it. Anyway when it's all mixed it should look like this-

Again, I would add more heat and maybe some minced garlic in with the herbs, but that's me.  Next, take some olive oil and just cover the bottom of a pan, about 1/2 cup ish, and then the recipe says to "drop heaping tablespoons into the oil, and fry until golden brown, about 3 mins on each side." I wanted them to be more like patties, so I rolled them into balls and squished them down, I found they stayed together better when I rolled them by hand and flattened them before putting them in the pan. However next time, I would try baking them in the toaster oven instead of frying them.

The finished product
Overall, these were good and super easy. Carson had fun playing on the floor with Bear by his side.


Here is the promised link to the original recipe
http://allrecipes.com/recipe/cauliflower-fritters-2/detail.aspx?event8=1&prop24=SR_Title&e8=Quick%20Search&event10=1&e7=Home%20Page

Friday, January 11, 2013

Because Everything is Better With Bacon

Found some inspiration for dinner tonight while perusing Pinterest this afternoon (will post links to the original recipes at the end). I made cheesy bacon potatoes, Grilled Cheese With Bacon, and had some Old Fashioned Lemonade to top it all off.

I used three large russet potatoes

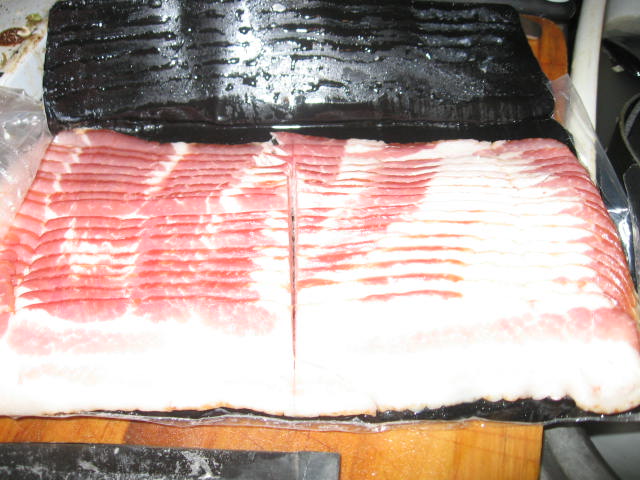
Peeled and chopped them into large chunks,  and boiled them, like I was going to make mashed potatoes. (I thought I took a picture of this but apparently I didn't but you get the idea. ) Next, I took out a package of bacon, and cut it in half.
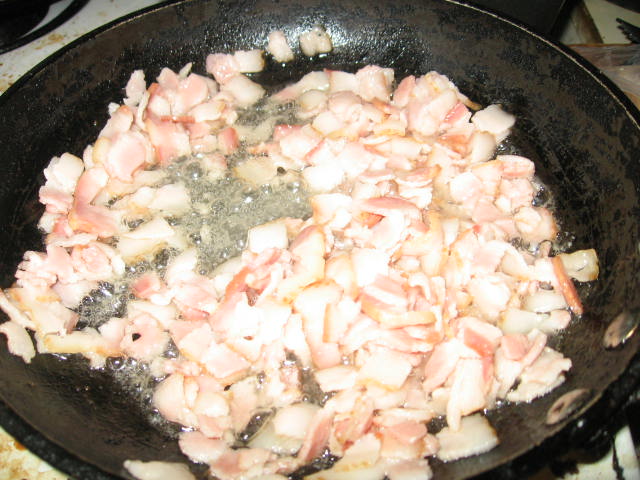
 I took half of the bacon and cut it up into little chunks and fried it up.
Then, after it was done, I blotted the grease off on put it on top of the potatoes, along with some fresh mozzarella I picked up at Costco..
... that needed to be used up. I took one of the balls and cut it up into little chunks and added it to the potatoes and bacon. I took some olive oil and drizzled it on top, and then added a spoonful of minced garlic, and sprinkled some pepper, garlic salt, and chili powder on top of everything.
I threw it in the oven at 350 until every thing else was done, about 30ish minutes. Really you are just melting the cheese and combining the flavors. About half way through I grated some cheddar cheese on top . About every ten minutes I went in with a spatula and turned everything around. It is done when the cheese is all melted an gooey, and the potatoes are a nice golden color.
The leftover potatoes

I then started on the grilled cheese. Remember that half of the bacon I didn't cook earlier? I left it in strips and fried it up here, blotted of the grease and set it aside. I cut up the remaining two mozzarella balls (there were three in the package) and cut up some cheddar cheese. I took some bread, buttered both sides, and added a whole heck of a lot of cheese. 2-3 slices mozzarella, 2 small  or 1 large slice of cheddar (enough to cover slice of bread), 3 pieces bacon, repeat cheese, cheddar touching bacon, mozzarella touching bread, and of course, the second slice of bread. I suggest heavily coating pan with pam so the bread doesn't stick to the pan and make you sandwich fall apart like mine did, but this was the first time making this so lesson learned.
note the bread sticking to bottom from the previous sandwiches?
 Watch carefully, as the bread can burn really easily.

Side note: All of you who love vanilla coke but never want to shell out the extra dough when regular coke is just fine...


 ... $1 2 liter of diet shasta and add a splash of Vanilla Bean Torani (which I found near the coffee at Smart and Final for about $4). SO freakin good!! Had this while cooking, but while eating I made some old fashioned lemonade the other day and so had a glass of that.  I swear, after drinking this, you will never want to go back to country time or minute maid again! And it's super easy. One part lemon juice, one part sugar, one part water. in a big pot dissolve sugar into water (low or medium low heat should do it). Turn off heat, and add lemon juice. ( I had a lot of lemons that needed to be used, so I had 3 cups of each) add zest of one lemon and pour into a pitcher, mason jar or whatever you have laying around. This is the syrup. To make the lemonade, get a glass, put about 1/4 cup of the syrup..


 .... add ice cubes if you have them, I do not, and so did not add ice cubes. If you want to be really fancy you can add a lemon slice. Next, add sparkling or regular water to the top of the glass.


Finally, add a few mint leaves and enjoy! 

Here are the promised links for the inspiration recipes

The Return Of the Blogger!

 (note star wars play on return of the jedi- for those who missed it)

 It has been a while since I have posted anything- much less made anything worth writing about. Motherhood has pretty much taken over and changed my life. I no longer have the luxury to spend three days working on a dress i hope will fit and look good. Or even an evening to throw together a handbag that will probably never be used. (I am thinking of making a set of crib rail covers though... and a few other baby things, like an anywhere chair and a snap on bottle holder that I have found on pinterest but i digress..) I did make some pretty good Bierocks last night that I wish I had blogged about.

So I have come to the conclusion that I am shifting this blog from a sewing blog to a Mommy blog as I am calling it. I have a mind to post about things like interesting and yummy recipes I am trying out. I have recently acquired  a bread machine at a local thrift store for $2.50 (score!) that I am dying to try out. I also am going to be writing about other aspects of life and when I try out new and cool crafty thing that I find on pinterest, and anything else that strikes my fancy to share! My son, Carson, is almost seven months old now and is already having all sorts of adventures. I am making his baby food and he seems to enjoy them. The best part is I get to control everything that goes into his body, and we have only been giving him organic produce. And boy does this kid love to eat! I may even do a piece on making baby food the next time I do, who knows!

Squash!


Well I do believe that cover everything new and exciting around here for now, but more to come in the very near future!

Friday, March 25, 2011

Coffee Date Dress from Burdastyle.com

Before looking at the sizing difference between Burdastyle.com and standard US sizing, I had already finished this dress. But that's ok, I have found it a good home.

I left off the ruffle in the regular pattern, as I thought it would be more versatile without it. It's simple and I was able to finish it in a few hours, but still very cute. As it turned out to be too small for me I obviously couldn't take a picture with it on.
Top 

Full Dress

Bottom

Shirt Simplicity 2409

I finished this one earlier this week, but didn't have time to write about it, I really like this one but if I were to do it again I would have went out and bought brown thread instead of using the orange I already had. Also I would have used Bias tape where it said to instead of "faking it", but that's ok. It's still pretty :)

Dress Butterick 5317

This dress in my favorite so far, and I completed it in one day :)
The directions were pretty easy to follow, and this was first time working with pleats and pockets.

Monday, March 7, 2011

My first dress!

For this dress I used McCall's patten 5094, and it was view "D". I am very excited, this being my first dress and all. It would have been done a couple weeks ago, but I had to find time to go and get a zipper, which i got last week, but forgot the hooks and eyes... I got those today, and it's done! :)
Dress Front

Dress Back